Meet Anyone Protocol: Your Online Privacy Shield!
Imagine browsing the internet like being in a crowded public place, everyone’s watching, and you’re exposed. Anyone Protocol is like having your private, invisible cloak that keeps your online activities hidden.
It creates a secure tunnel for your data, making sure it’s protected from prying eyes, hackers, and online trackers. Let’s break down what makes it special and how you can set it up on your Mac.
Why is Anyone Protocol So Special?
- Top-Level Privacy with Strong Encryption
Anyone Protocol encrypts all your data, meaning it scrambles everything into a secret code only you and the intended server can understand. It’s like sending a locked box with only one key, far more secure than your typical VPN. - Fast Connections with Mesh Networking
Think of mesh networking like a direct, express route for your data—it cuts out the middleman (central server), making everything faster and smoother, which is great for streaming, browsing, and gaming. - Choose What to Protect
You can set Anyone Protocol to protect your entire device or just specific apps. This gives you full control over how much privacy you want, when, and where. - No Activity Logs—Ever
Unlike some VPNs that keep logs of what you do, Anyone Protocol keeps nothing. No data, no tracking, nothing. You stay anonymous, full stop.
How to Connect Anyone Protocol with macOS: Easy Step-by-Step Guide
Let’s get you set up with Anyone Protocol on your Mac, even if you’ve never used a tool like this before. I’ll walk you through each step, so no worries if you’re not a tech whiz.
Step 1: Check Your Connection First
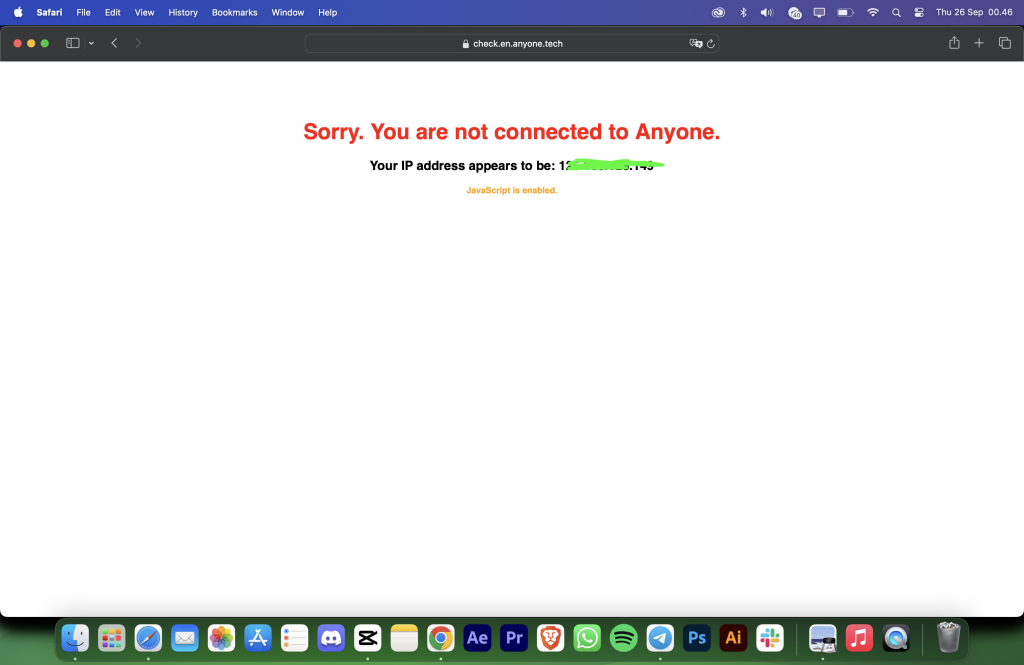
Before installing anything, it’s good to check if your Mac is already connected to Anyone Protocol. Open your web browser (like Safari or Chrome) and go to https://check.en.anyone.tech. This will tell you if you’re already connected. If not, you can follow the next steps.

Step 2: Installing the Anyone Client with NPM
a. Installing Node Version Manager (NVM):
NVM is like a toolbox that helps your computer handle different versions of an app called Node.js, which you’ll need to use NPM (Node Package Manager). Don’t worry, here’s how to get it.
- How to Access Terminal: Terminal is a little like a chat window where you talk directly to your Mac. To find it, go to your Applications folder, then to Utilities, and open Terminal. You can also quickly find it by pressing
Cmd + Spaceand typing “Terminal” to open it.

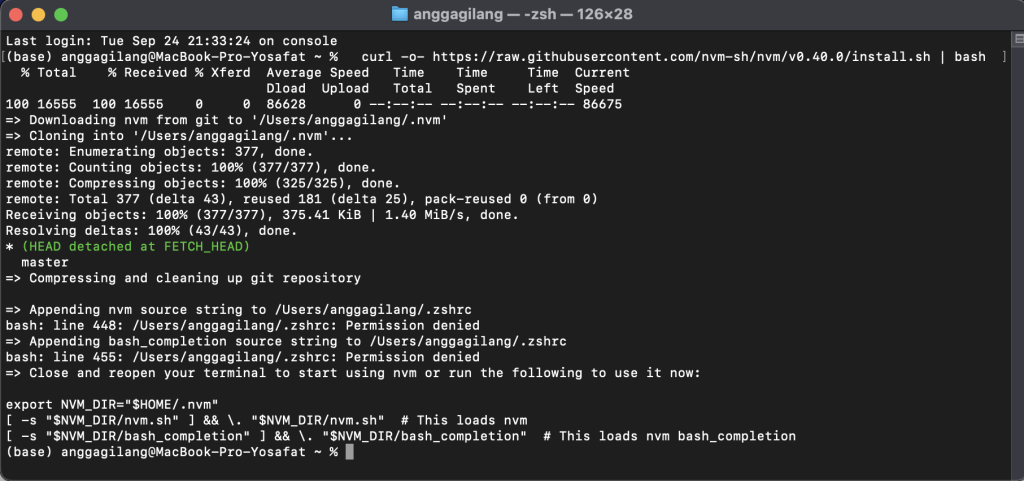
- Installing NVM: In Terminal, type or copy-paste this command, then press Enter:
curl -o- https://raw.githubusercontent.com/nvm-sh/nvm/v0.40.0/install.sh | bashThis command tells your Mac to grab NVM from the internet and set it up. After it finishes, close and reopen Terminal to activate NVM.

b. Installing Node.js Version 20:
Node.js is what allows NPM to run, and we’ll need it to install the Anyone Client.
- Type the Following Command:
nvm install 20After that, check if everything installed correctly by typing:
  node -v
  npm -v
If you see version numbers, great—you’re good to go!
c. Installing the Anyone Client:
- Now, Install the Client with This Command:
npm install @anyone-protocol/anyone-clientStep 3: Running the Anyone Client
Now that the client is installed, it’s time to turn it on and start protecting your connection.
- Use This Command to Start the Client:
npx anyone-clientYou’ll see some messages pop up confirming that the client is running. If you need to tweak settings, like changing ports, you can add parameters like -s 9050 after the command.
Step 4: Set Up System-Wide Routing with Proxy Settings
We want to make sure all your internet traffic goes through Anyone Protocol. Here’s how to adjust your Mac’s settings:
- Open System Preferences: Click on the apple icon in the top left corner of your screen, then choose System Preferences.
- Finding “Proxies” in the Network Menu: Click on Network, then look for the “Proxies” tab in the side menu.
- Set Up SOCKS Proxy:
- Check the box for SOCKS Proxy.
- Set the Server to
127.0.0.1and the Port to9050.
These settings will route all your Mac’s internet traffic through Anyone Protocol, ensuring everything stays secure.

Step 5: Verify Your Connection is Working
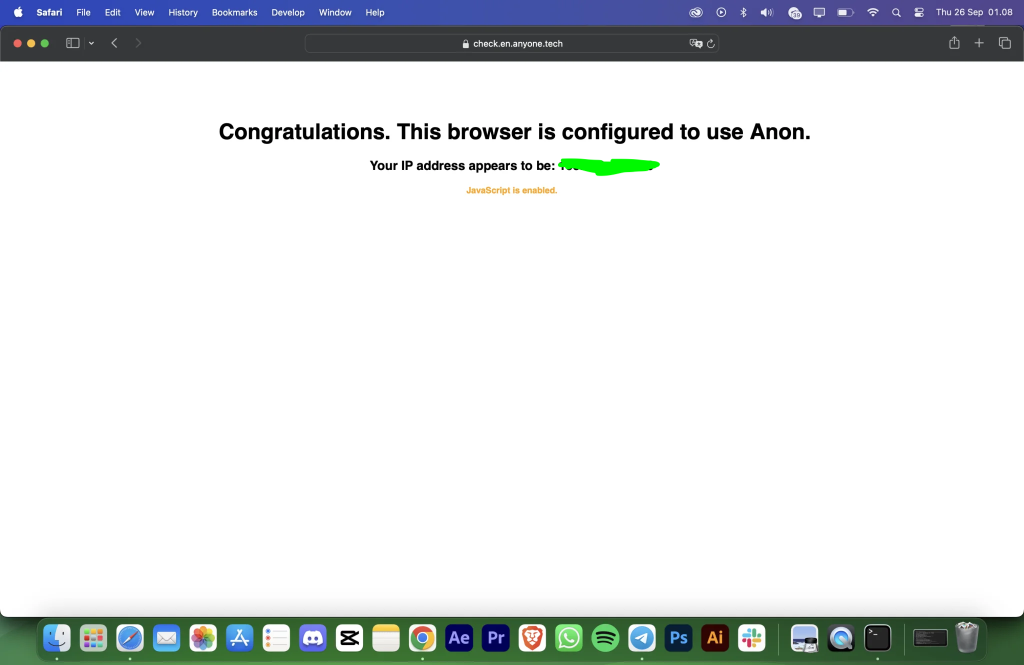
Once everything’s set up, head back to https://check.en.anyone.tech to confirm that you’re connected. If the page shows that your IP address has changed or indicates that Anyone is active, you’re all set!

Quick Setup: One-Click Method (Beta)
If all these steps seem like a bit much, there’s a super quick method that does it all in one command, perfect if you want to get set up in seconds.
- Copy and Paste This Command:
Open Terminal, paste the following command, and hit Enter:
/bin/bash -c "$(curl -fsSL https://raw.githubusercontent.com/anyone-protocol/anon-install/main/macOS/start_proxy.sh)"- Turning Off the Proxy:
If you need to disable the proxy, just pressCmd + Cin Terminal.
What Does This Command Do?
- Automatically Downloads and Runs the Client: It fetches the Anyone Client from the internet and starts it up for you.
- Sets Up Proxy Settings: It configures your Wi-Fi to use Anyone Protocol, so you don’t have to adjust anything manually.
Wrapping It All Up: Why Anyone Protocol is the Right Choice
Anyone Protocol makes protecting your privacy online easy, whether you’re just trying to keep your browsing private or need something more robust for your work. The manual setup gives you complete control, while the one-click option lets you secure everything in no time.
So why not give it a shot? It’s simple, secure, and puts you in charge of your online safety. With Anyone Protocol, you can surf the web with peace of mind, knowing your data is locked down tight. Try it today, you’ll love the freedom and security it brings!


